If the car has a natural enemy, it’s rust. Left unattended it’s unsightly and unsafe, but can be repaired with the right products and a bit of effort. You can keep your car in top condition by checking your body work as often as you check your oil and repairing rust spots as soon as they appear.
What you'll need
- Wax and grease remover
- A panel hammer
- A grinder or sanding block
- Grinding discs or sand paper
- Rust converter
- Glass fibre filler or metal tech
- A plastic mixing applicator
- A small paint brush
- Car filler
- Safety gear
Tips and Warnings
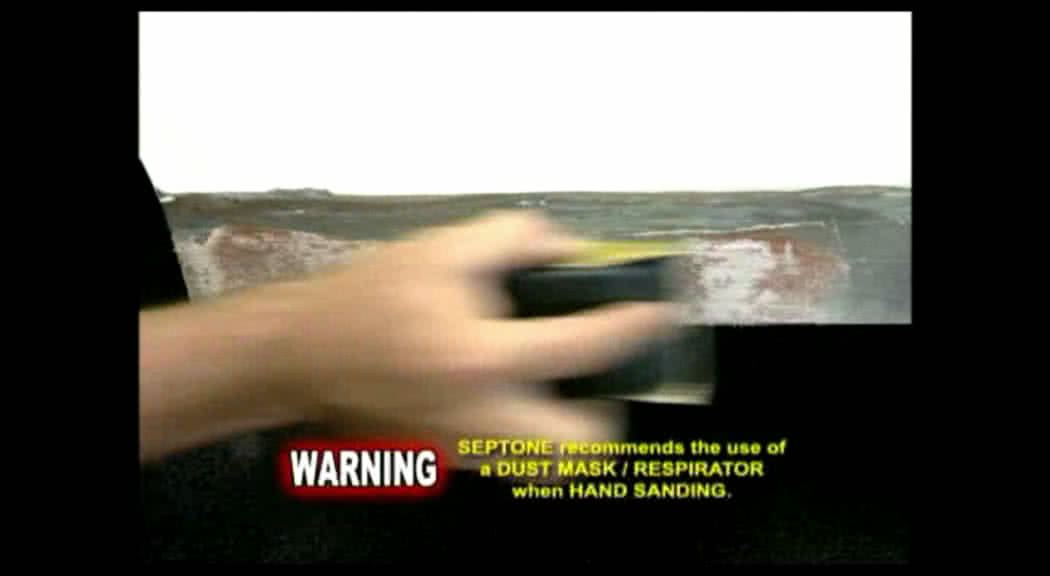
- Ensure you wear correct safety gear including glasses and a dust mask, as small rust and paint particles can be hazardous for your eyes and lungs
- Take care mixing hardeners with fillers because a mixture with too much or too little hardener will remain soft and will have to be removed
- When applying the mixture, use firm pressure on the applicator to force product into all crevasses and eliminate any air pockets
- Note that car filler should not be wet sanded as it will cause rust under your repair
- Car fillers should also not be applied to painted metal as the mixture will not dry and will have to be removed
Before You Start
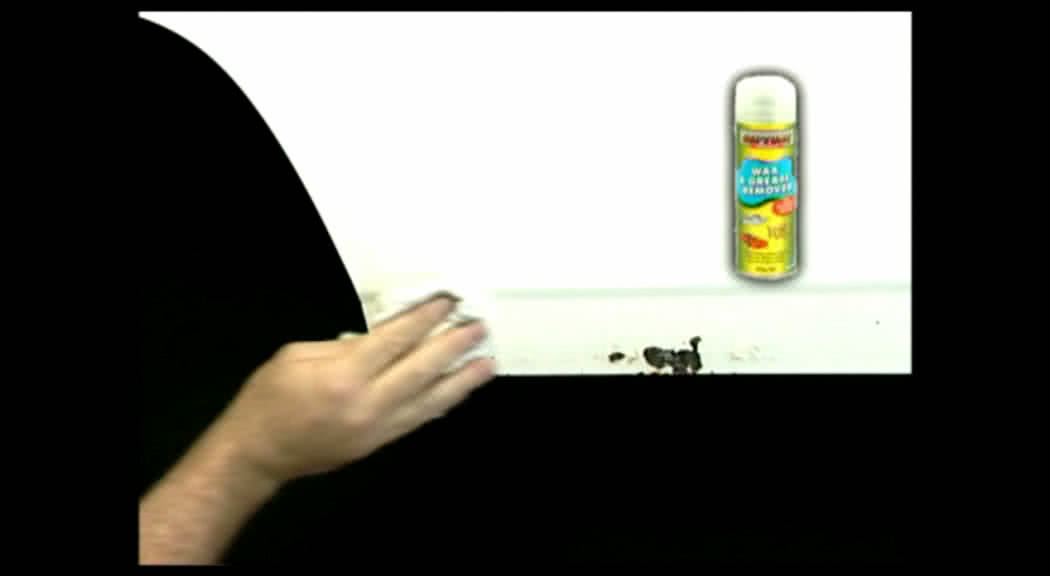
It’s important to start with a clean surface. Using one clean dry cloth, apply a wax and grease remover and wipe clean with another. This ensures that any bitumen, car polish and other contaminants are completely removed.
Step 1 – Remove The Paint

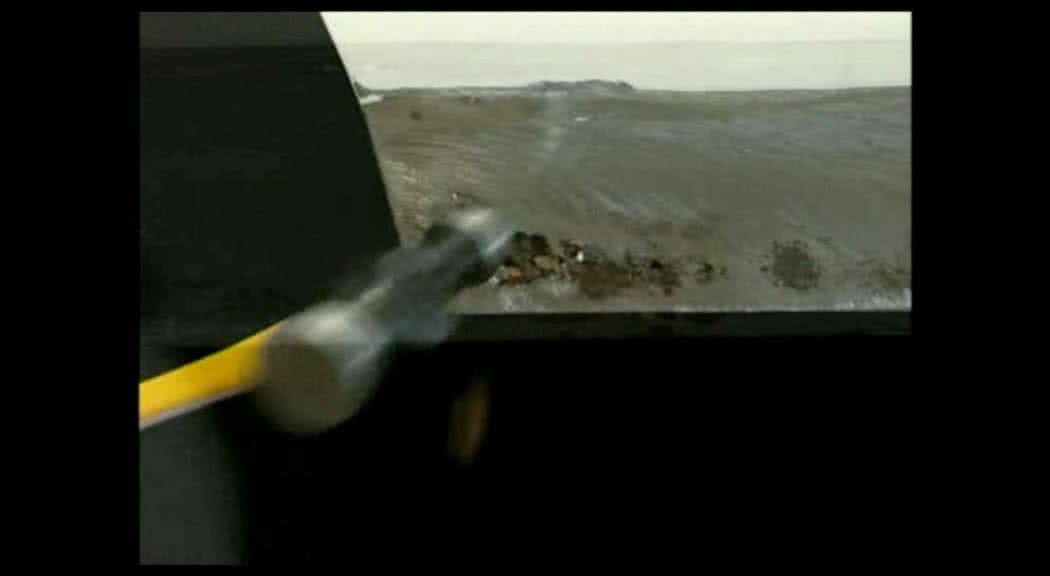
Remove the paint from the rusted area and the surrounding area (approximately 50mm) by machine or hand sanding with 24-36 grit sandpaper. Using a panel hammer, ensure all loose sections of rust are removed.
Step 2 – Treat Rusted Areas
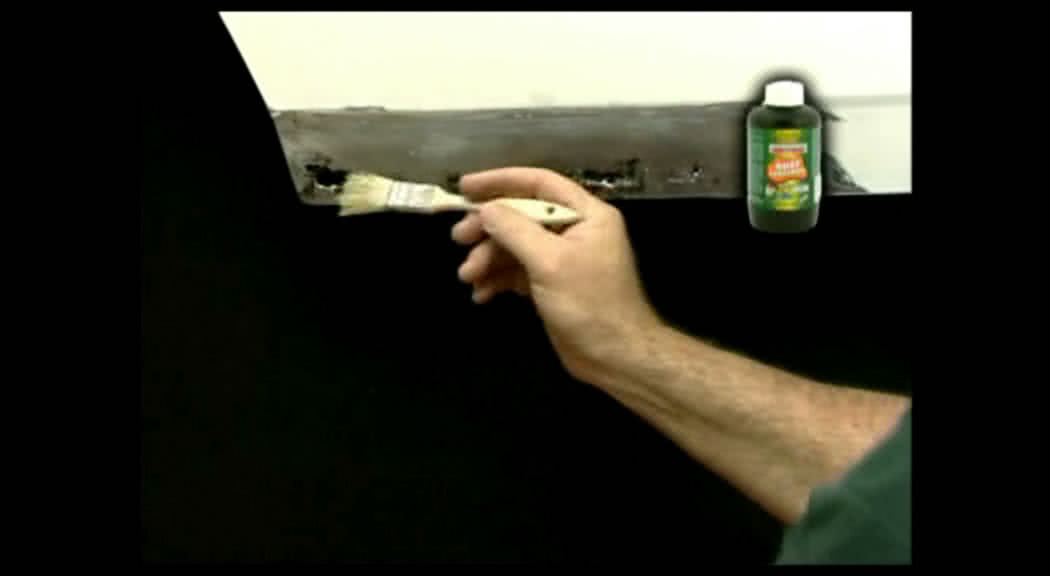
Treat rusted metal by brushing on rust converter. Be careful not to apply to clean or painted metal and ensure the surface is completely dry before proceeding.
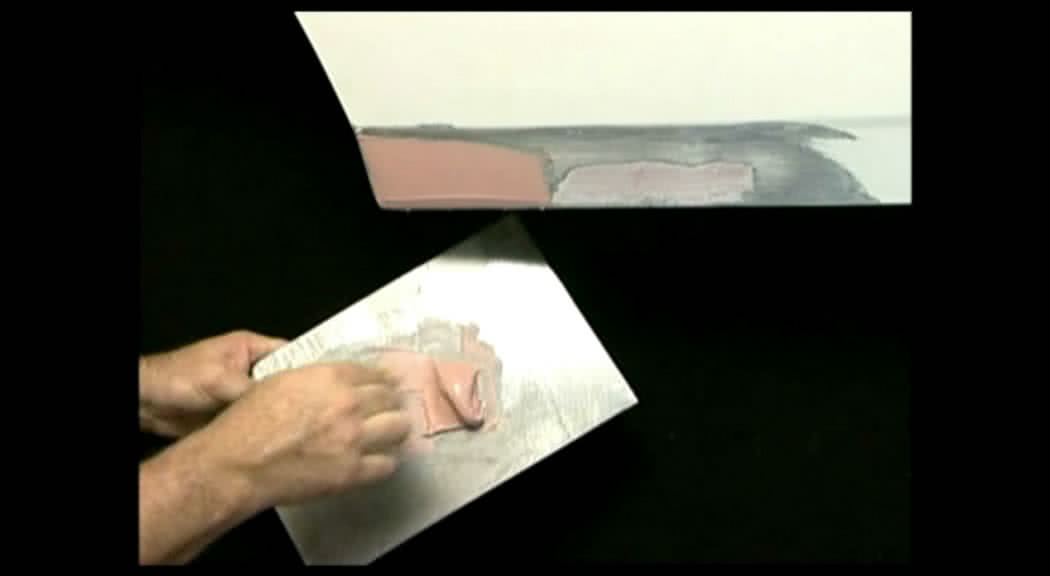
Step 3 – Apply A Filler
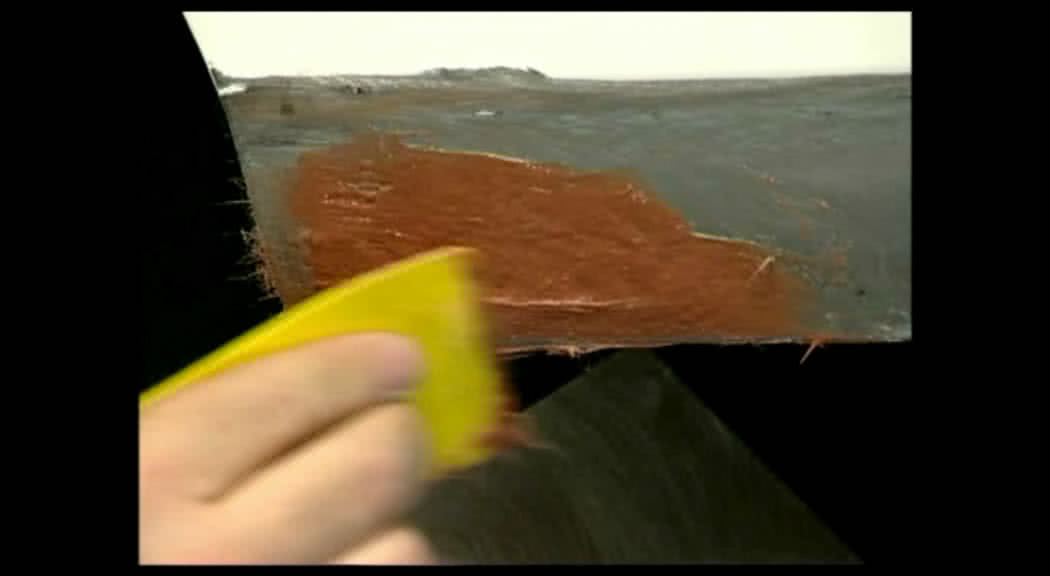
Mix the required amount of fibre filler or metal tech - use a one part hardener to fifty part filler ratio and ensure the tone is visibly continuous before proceeding. Immediately apply a thin layer to the repair surface and gradually apply remaining filler until it’s slightly higher than the surrounding edge of the repair.
Step 4 – Sand The Repair Surface
Once the product has fully cured or hardened (if mixed correctly, this should take 20-30 minutes) it will be ready to be sanded by hand or machine using 40-80 grit sandpaper. Sand back until the filler is level with the surrounding panel. Note that fibre filler or metal tech provide necessary added strength, but are patching fillers only and do require an application of car filler to fully level and smooth the area.
Step 5 - Apply Car Filler
Clean the surface thoroughly and repeat steps three and four using car filler instead of fibre filler. Note that car filler can be reapplied if further filling is necessary but cannot be wet sanded. Finally, feather sand the repair surface with 120-180 grit sandpaper to achieve a smooth surface. You have now repaired the rust infected panel and it is ready for the paint repair stage.
*Important information* - Click here to read more about our How-To terms and conditions.